How to Install and Use Brushes in Adobe Illustrator
Illustrator brushes help you create complex designs and speed up your design creation process. Often, designers create their own brushes. And sometimes, you just want to quickly get an effect or style for your design.
That's the value of having Illustrator brushes ready to download. If you don't know how to add brushes to Illustrator, don't worry. Let's break down how to install and use brushes to make the most of this fantastic feature!
What You Will Learn in This Adobe Illustrator Brush Tutorial
How to install brushes in Illustrator
How to open and save the brush library in Illustrator
How to edit brushes in Illustrator
How to use brushes in Illustrator
Follow along with us over on our Envato Tuts+ YouTube channel:
Tutorial Assets
To complete the tutorial, I used the following assets:
Rope Brush Illustrator Set
If you're looking for the best Illustrator texture brushes, scroll down after this tutorial and find our selection of premium Illustrator brushes from Envato Elements.
1. How to Extract the Brush File
1.
Step 1
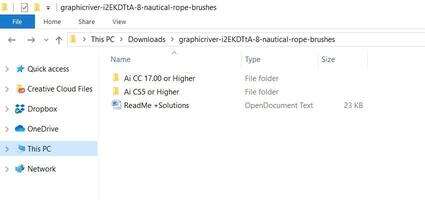
Let's start with a freshly downloaded zip folder. Locate your download on your machine and Extract its contents. Do so on a Mac by double-clicking. Do so on a Windows machine by right-clicking and hitting Extract All.
Your brush files may vary, but these have files for both Adobe Illustrator CS5 and higher and Adobe Illustrator CC and higher. In the case of this file, the brushes are in an .AI file.
Step 2
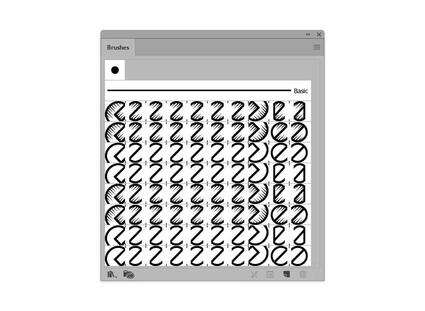
Open the .AI file in Adobe Illustrator CC. Open the Brushes panel, and you'll find your new brushes are already loaded and ready for use.
Step 3
Draw a path with the Ellipse Tool (L) and apply one of the brushes from the Brushes panel to check out the brush pack. Take the Paintbrush Tool (B) for a spin too, and see how the brush handles a variety of angled and curved paths.
If you want to use these brushes in other documents, you'll have to save the brushes file. Let's do that now!

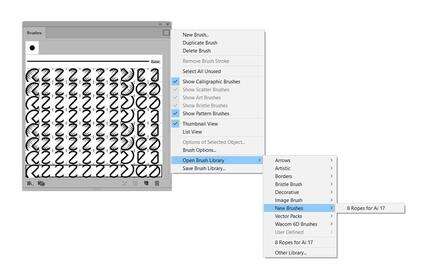
2. How to Save the Brush Library
2.
Step 1
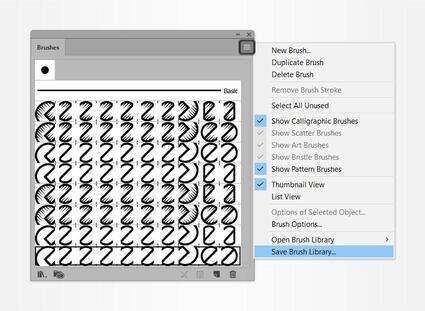
Under Options in the Brushes panel, select Save Brush Library... You'll be able to save your brush library anywhere on your machine. I like to keep things organized, and rather than saving it in the default hidden folder, let's navigate to our preset brushes folder.
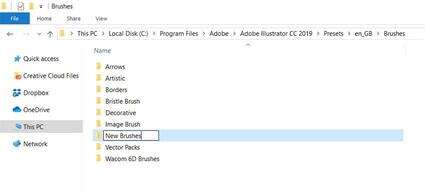
If you're on a Mac, you'll want to head over to Applications/Adobe Illustrator CC 2015/Presets/Brushes/, and if you're on a Windows machine, you'll want to head over to C:\Program Files\Adobe\Adobe Illustrator CC 2015\Presets\en_US\Brushes\New Brushes. These are the default preset folder locations. If you've made changes to where and how Adobe files are stored on your computer, your locations may differ.
Step 2
Create a New Folder in your preset brushes folder. Mine is named New Brushes, and this is where I'll be saving my brush libraries for easy navigation and retrieval in the future.
Step 3
Now, when you select Open Brush Library from the Brushes panel options, you'll see your new folder amongst the other preset folders and can load that brush library into any of your documents. You can also save brush libraries in any of the other preset folders. How you organize your program, files, and computer is entirely up to you.
3. How to Edit the Brushes
3.
Step 1
Draw a shape or path with a drawing tool from the Toolbar and apply one of the brushes from your Brushes panel.

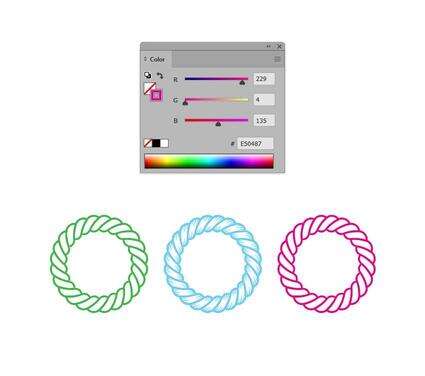
Step 2
Select any of your paths and change the Stroke color in the Color panel. Much like changing the stroke color of any simple stroked path, you can also double-click on the Stroke in the Toolbar in order to open up the Color Picker and change the color from there.
Step 3
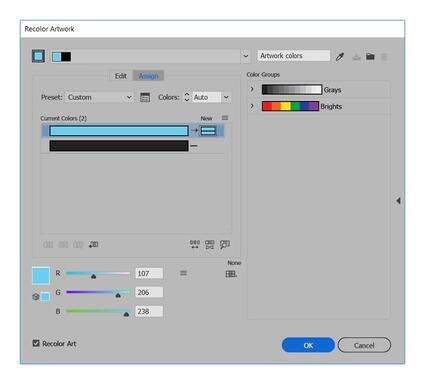
For more complex brushes, you can use the Recolor Artwork option. Select your path and go to Edit > Edit Colors > Recolor Artwork. Depending on how complex your brush's artwork is, you'll have the option of changing the current colors to whatever you want.
Step 4
Another quick and easy change is Stroke Weight. You can do this in the Stroke panel. Note the difference in this brush in 1 pt, 2 pt, and 3 pt weights.

Step 5
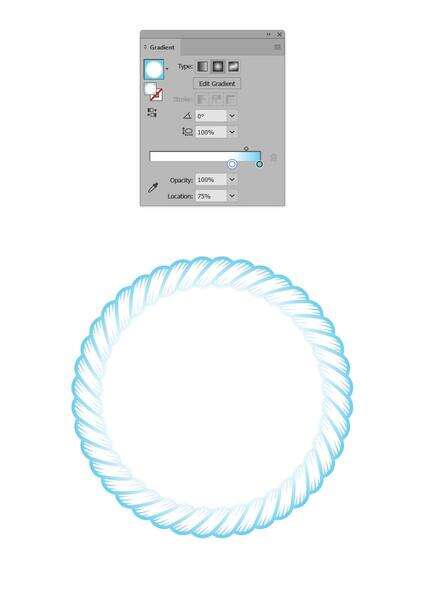
Finally, for further editing, Expand the brush stroke under Object > Expand to easily apply gradients and other effects to the brush as an object. In order to more easily apply the Radial Gradient seen below, I also United the newly expanded objects in the Pathfinder panel in order to create a compound object.
Great Job, You're Done!
Well done! In this quick tutorial, we downloaded and loaded up a brush library file. We also learned how to organize our brush library and how to edit brushes within Adobe Illustrator. With these simple instructions, you'll be able to use and modify any brush library you may be using, whether it's something you made yourself or not.

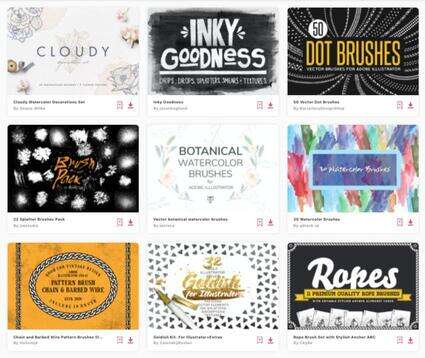
5 Top Illustrator Brushes to Download From Envato Elements
You've learned how to add brushes to Illustrator and how to edit brushes. Now, let me show you a hand-picked selection of the best Illustrator texture brushes from Envato Elements.
For a low monthly fee, you can enjoy unlimited downloads of premium Illustrator brushes and more digital assets, like actions and presets, graphic templates, and more.
If you're a graphic designer looking to expand your Illustrator brush library, here's a great selection for you:
1. Rope Brush Illustrator Set With Anchor Letters (AI, EPS)

Are you looking for a rope brush Illustrator set? These Illustrator texture brushes are a great option. The pack comes with 11 high-quality rope brushes and 28 anchors with a rope alphabet.
2. Watercolor & Black Pattern Brushes (AI)
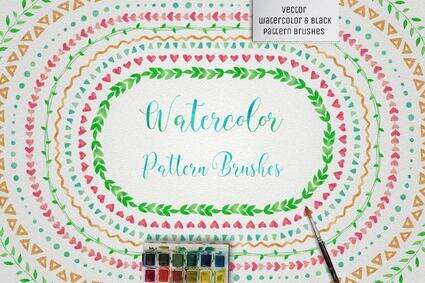
A pattern brush Illustrator set is always helpful. This watercolor pattern brush Illustrator pack will give your designs a trendy look. You'll get 42 watercolor handmade brushes in vector format for Adobe Illustrator. Additionally, the pack comes with 42 black pattern brushes.
3. Big Illustrator Brushes Pack (AI, EPS)
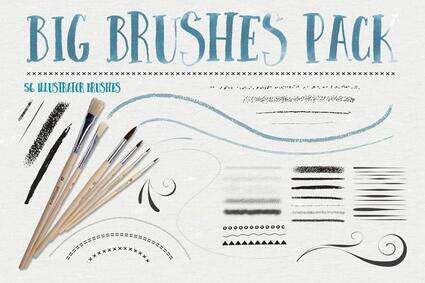
This is the ultimate Illustrator texture brushes pack. You'll get 56 varied illustrator brushes, including stipple brushes, chalk and pastel, ink, flourish, pattern brush Illustrator files, and more. The set also includes four distressed stipple seamless vector swatches, an Illustrator swatch file, and EPS CS4 files.
4. Shader Brushes for Illustrator (AI, EPS, PNG)
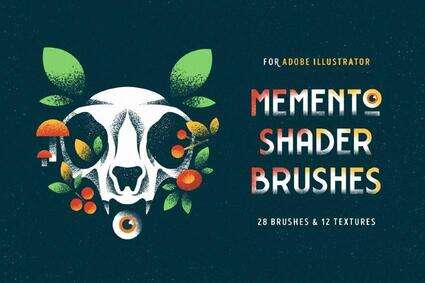
This spraypaint brush Illustrator set comes with 28 brushes divided into four groups. And that's not all. In this pack of Illustrator texture brushes, you'll also get 12 textures as a bonus to wrap up your composition. See what you'll get:
7 shader brushes
7 noise brushes
7 hatch brushes
7 edge brushes
12 textures
5. Chain and Barbed Wire Pattern Brush Illustrator (AI, EPS)
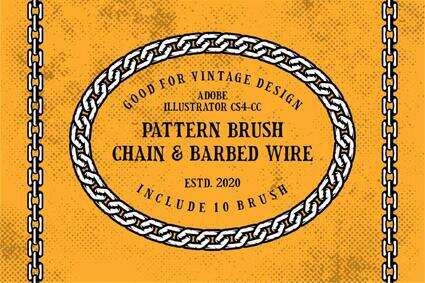
Do you need a chain brush Illustrator set for your next design? This pack comes with ten brushes, so why not give your design an industrial look with this chain brush Illustrator set. These are great pattern brushes for Illustrator.
Explore More Illustrator Brushes Resources
I hope you liked this selection of rope brush Illustrator sets, spraypaint brush Illustrator packs, and Illustrator texture brushes. Learn more about Illustrator brushes with these tutorials and resources:
Illustrator Brushes
How to Make a Brush in Illustrator
Andrei Stefan
Illustrator Brushes
How to Make a Watercolor Brush in Adobe Illustrator
Andrei Stefan
Illustrator Brushes
A Huge Compilation of 39 Free Illustrator Brushes
Sonali Vora
Text Effects
Use a Pattern Rope Brush to Create a Rope Text Effect in Illustrator
Andrei Marius
Illustrator Brushes
How to Create a Pencils Text Effect in Adobe Illustrator
Andrei Marius
Pattern Brush
How to Create a Rainbow Text Effect in Adobe Illustrator
Andrei Marius
Text Effects
How to Create a Rocket Fireworks Text Effect in Adobe Illustrator
Andrei Marius
Brushes
Quick Tip: How to Create a Pencil Pattern Brush in Adobe Illustrator
Andrei Marius
Illustrator Brushes
How to Make, Use, and Manipulate a Calligraphic Brush in Adobe Illustrator
Mary Winkler
Brushes
How to Create a Confetti Brush in Adobe Illustrator
Sharon Archer-Thomas