How to Warp Text in Adobe Illustrator
Want to warp some text? In this video from my course, 10 Essential Design Tips in Adobe Illustrator, you'll learn all the ins and outs of distorting and warping text in Adobe Illustrator.
How to Warp Text in Adobe Illustrator
Prepare the Text for Warping
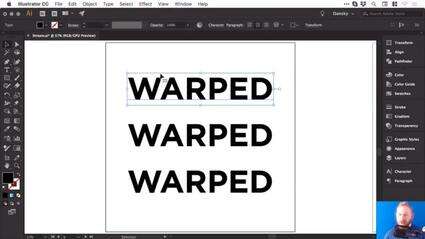
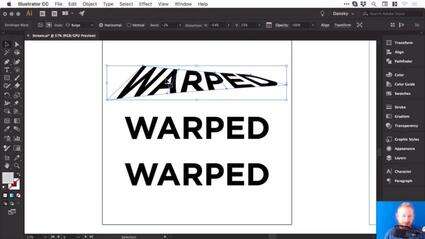
So we're going to learn how to warp stuff. Let's grab our Type Tool, left click anywhere on the artboard, and type some text. Let's type "WARPED". And we can go to the Character panel at the top, and we can pick a font—let's go for Gotham Bold.
Then I'm going to go to the alignment options and select Align Center so that it's in the middle. Now let's create a couple of copies by holding Alt-Shift and dragging. So your screen should look like this:
Create a Bulge Effect
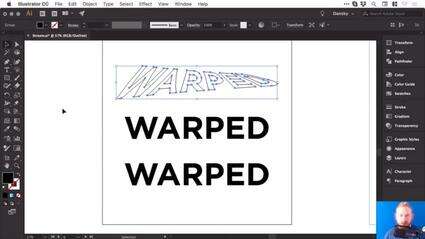
We'll select the first piece of text, and go to Object > Envelope Distort > Make with Warp. We've got the Preview option checked, and we can choose the Style as well. There are lots of presets to choose from, so let's go for Bulge, and see how that looks.
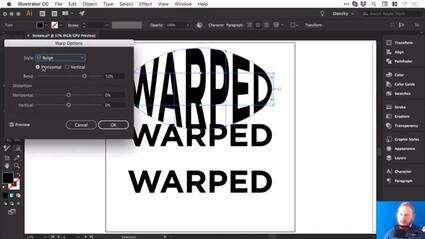
So at the moment, we are bulging this text horizontally, and we can adjust that Bend slider. So, of course, we can go up a few percent and you'll see it starts to bulge outwards. Or we can go ever so slightly into the negatives and it will go inwards.
You could also bulge this vertically, so it'll behave slightly differently. It really does depend what you're going for.

We could also distort this both horizontally and vertically, using the slider. So you could make one side appear larger by dragging the Horizontal Distortion slider to -100.
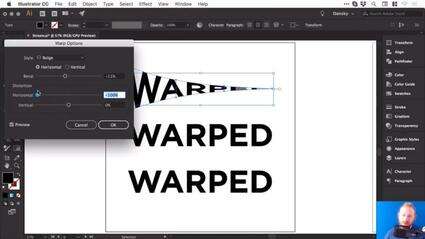
But let's go for something more subtle. Choose the following values:
Horizontal Bend: -2%
Horizontal Distortion: -54%
Vertical Distortion: 25%
Then click OK, you can see that we've warped the text.
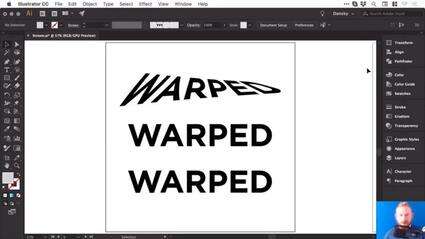
And if we click on it, we still have all of these options along the top, where you can change the preset and other values.
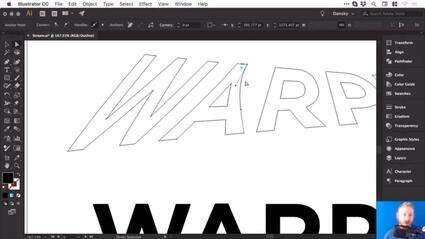
Now, at the moment, if I press Command-Y to go into outline mode, you can see that it's still got a box and lines around it, and I can't change the fill color or anything.
So what I recommend is once you've done your warp, and you're happy with your text, go to Object > Expand. Leave Object and Fill selected, click OK, and then we can switch into outline mode again, and you'll be able to see your text.
Now remember, when you expand anything in Illustrator, essentially what you see becomes the paths of the shape. So this is now made up of lots of different anchor points, and we can go in and adjust these if we want to fine tune that warp.
But also, when we select it, it now has a fill color, and we can easily change it if we want to.
Create an Arc Effect
So let's go and warp something else.
Click on the second piece of text and, as before, go to Object > Envelope Distort > Make with Warp. This time, for the Style, let's choose Arc. So we'll set the Distortion back to 0, and then we can bend this up or down, and of course, you can adjust the Bend to Vertical as well.
Let's try these settings:
Vertical Bend: -72%
Horizontal Distortion: -100%
Vertical Distortion: 0%
And it should look like this:
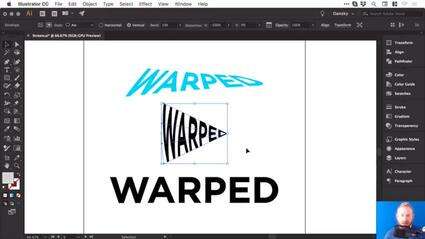
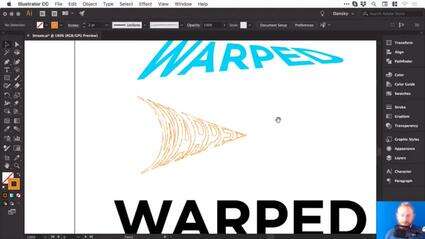
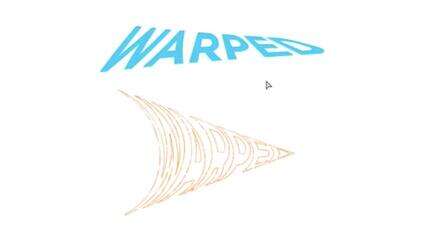
Once you're happy with your warp, and you'd like to start adding color to it, or possibly getting creative and adding some strokes or brushes, you can go to Object > Expand. Leave Object and Fill selected, click OK, and now we can get creative with this.
Let's add some brushes. We'll start by swapping the fill and the stroke, so we now have an outline. And from the Brushes panel, let's choose a pencil brush with an orange color.
So those are a few ways to warp text in Illustrator, and now I'll leave you to go and have a lot of fun experimenting with them.
Watch the Full Course
In the full course, 10 Essential Design Tips in Adobe Illustrator, you’ll learn about ten essential design tips to help you bring your creative ideas to life in Adobe Illustrator. You'll master a variety of different techniques, helping you to boost your creativity and transfer your ideas to a digital canvas.
You can take this course straight away with a subscription to Envato Elements. For a single low monthly fee, you get access not only to this course, but also to our growing library of over 1,000 video courses and industry-leading eBooks on Envato Tuts+.
Plus you now get unlimited downloads from the huge Envato Elements library of 490,000+ creative assets. Create with unique fonts, photos, graphics and templates, and deliver better projects faster.